Wednesday, April 9, 2014

NEW POST - Fabric Christmas Angel

It has been awhile since I last posted on my blog, so here is what's been happening.  After an earlier than expected retirement last June as a High School Principal's Administrative Assistant, I waited the mandatory 6 months then signed up on the sub list.  2 days later I got a call that I was needed to fill in for 4 or 5 days until a replacement could be hired for a departing Administrative Secretary at the District Office.  4 or 5 days turned in to 7 weeks!! My retirement routine went down in flames and crafting and blogging were put on hold.  This body just doesn't have the get up and go that it used to.  I thoroughly enjoyed the job but was dog tired when I got home at the end of the day.  

Now that I'm back to being "retired" I am slowly getting back to the things I love to do. Today I want to share with you a darling fabric Christmas Angel that I adapted from a picture I saw on Pinterest.  These are easy to make.  Hope you will give it a try.  


Supplies: 
2 6" squares contracting fabrics
1  1 1/2" x 3/8" wooden circle
2  8"x 8"  pieces wool felt
8" piece gold cording for hanging
1 small wood heart button or other button of your choosing
small piece of lace for halo (optional) 
Embroidery thread
Hot Glue Gun 
Powder blush & Q-Tip
Craft paint:  flesh, black, white
Thin chipboard or an empty cereal box to make templates

First you will need to make a circle template for the body.  I used a piece of chipboard (thin cardboard) but if you have an empty cereal box that will work, too.  Re-use and recycle is always a good thing.  Using a protractor ( or you could use a bowl or a small plate if the dimensions are right) make a circle 4 1/4 inches in diameter.  

You will need 2 pieces of contracting fabric cut to about a 6 inch square.  Place your fabric right sides together and trace a circle using your cardboard template.  An ink pen or dark pencil works for tracing.
Stitch around the line you have drawn using a 1/4 inch seam allowance.  Leave about a 1 1/2 inch opening for turning your angel dress right side out.  After you have stitched, use your scissors to clip to the stitching line about 1/4 inch apart all the way around where you have stitched.  You won't need to clip the opening.  
Turn right side out.  I like to use a chopstick for turning and run it around inside to shape my circle.  You won't need to slip stitch the opening closed because it won't been seen on the finished angel.  Press your circle with a warm iron to flatten and smooth out the wrinkles.  
Decide which side you want as the inside of the dress.  Place that side up facing you and make sure that the opening you used for turning is at the top.  
Then fold back about 1/3 of the circle.  The picture above could have been folded just a little bit more.  I also slip stitched the opening closed in the picture above, then realized that I didn't need to.  Imagine the unstitched opening at the top.  

Use a few stitches to tack the opening down.( I was making a dozen of these so don't think your eyes are playing tricks on you because of the different fabrics.).  
It should look like this on the front.  If you like, you can press with your iron to help keep the shape.  Woo Hoo!!  Your angel dress is finished.


The next step is to paint the faces.  I used a 1 1/2" x 3/8" wooden circle.  Paint both sides of the wood and the edge with a flesh colored craft paint and let dry.  For the eyes, I used a stylus (or you could use the handle of a small paint brush) to "dip dot" the eyes with black. After the black has dried, "dip dot" the white part of the eyes and let dry.  I used powdered blush and a Q-tip to brush on the cheeks.  It you have spray wood sealer, a list misting will keep the blush in place.  I also added a small piece of lace for a halo or you could paint on a gold halo with craft paint if you prefer.  Use your imagination here to put your personal touch on the face.
Next comes the wings. 
I cut a 3 1/2 inch square of copy paper, folded it in half  and free handed a heart shape.  Once you have the shape and size that you like, use your paper template to trace a sturdier one from your cardboard/cereal box.  Cut out and use to trace the wings on your felt which has been folded double so you only have to cut once for double ply wings. 

I used the heavier wool felt  that you can buy at Joann's or other fabric stores.  I used an ivory color but white or even gold felt would look amazing.  I would not recommend using lighter weight felt squares unless you make the wings 3 layers thick.  You need some stiffness so they won't be floppy.  


Once you cut out your wings, use embroidery floss or several lengths of sewing thread to stitch around the heart. Do some fancy stitching if you like. You can coordinate the thread to match your fabric or use gold thread as an accent.  
To assemble your angel you will need a hot glue gun or fabric glue.  I really like Fabri-Tack glue.  It adheres very well and I don't have to worry about burned fingers.  You can get it at Michael's or Hobby Lobby.  

Cut an 8 inch piece of cording, ribbon, jute or what ever your choice for a hanger.  Glue it in place on the front side of the dress between each side of the collar.  Next glue on the head. Once the head is in place, turn the angel over and glue on the wings making sure to cover the the opening that was left open for turning.  Once the wings are set you can add a wooden button as shown in the picture or use fancy gold heart buttons that you might have on hand. Again, add your own personal touch.

I hope you enjoy making a few of these for gifts or to decorate your Christmas tree.  If you have questions about any of the directions please let me know.  I always enjoy your comments.  Happy Crafting...until the next time.

Saturday, March 1, 2014

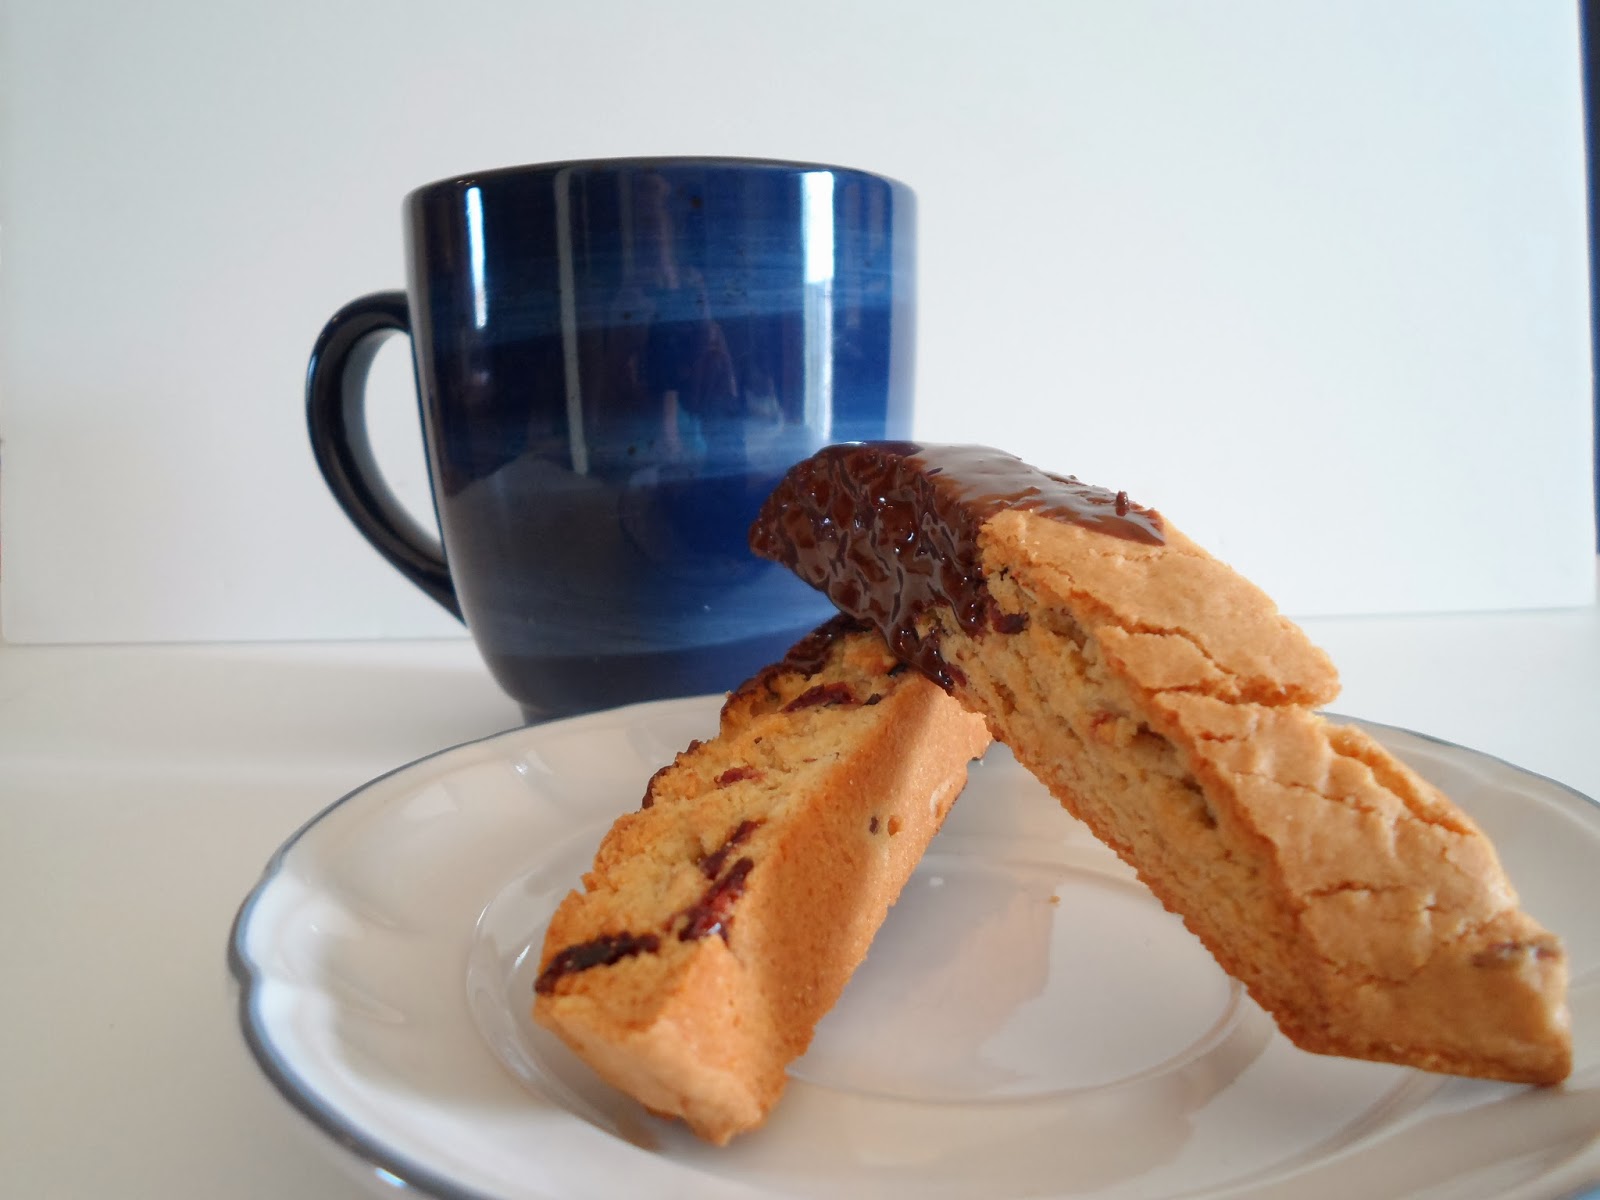
NEW POST - Almond Biscotti

My favorite breakfast in the morning, make that just about every morning, is a cup hot chocolate and a couple of biscotti.  If you can find Stephen's Hot Chocolate in your area you have to try it.  Winco is the only store locally (greater Sacramento area) that carries the brand that I am aware of.  My daughter picked up a can of Pumpkin Spice flavor about 2 months ago. I made her go back and buy all the cans they had left. It is that good.  You can order online if you can't find it locally.  I just read that in September they are bringing back two of their most popular flavors:  Orange Creme and Italian Amaretto.   Can't wait!  Here is a link to their website:  http://www.indulgentfoods.com/.

Now that we have the beverage taken care of, I want to share my favorite biscotti recipe with you.  It is a recipe that I created from several of my favorites.  I make a batch every couple of weeks, more often if I go on a biscotti binge.  It is easy to make.  Hope you will give it a try.


Cranberry Almond Biscotti

1/2 cup softened butter
1 1/4 cups sugar  (I like to use 3/4 cup white sugar and 1/2 cup brown sugar)
2 eggs
1 tsp almond extract (sometimes I increase it to 1 1/4 tsp. for a little more flavor
2 1/4 - 2 1/2 cups flour (for chocolate flavor biscotti, substitute 1/4 cup flour with 1/4 cup cocoa powder)
1 tsp baking powder
1/4 tsp salt
1/2 cup sliced almonds
1/2 cup Craisins

Preheat oven to 350 degrees.  In a mixing bowl, beat together butter and sugar(s) until smoothly blended. Add eggs and almond extract and beat until mixture is smooth and creamy.  In another bowl combine flour, (cocoa, if you want chocolate flavor), baking powder and salt.  Mix in to butter mixture until smooth.  Dough should be firm and just a little sticky.  If it sticks to your fingers add a little more flour.  You want to be able to form it in to shape without most of the dough sticking to your hands.  Stir in the almonds and Craisins.

Divide the dough in half and shape into 2 logs, about 11 inches long, 1/2 inch high and about 5 inches wide.
Don't stress about the dimensions.  They should look something like this:


Place on a greased cookie sheet (I use PAM on a regular cookie sheet but I also love this Silpat from Pampered Chef, which you don't have to grease).  Bake for 30 minutes.  Remove from oven and cool for 10 minutes on the pan.  Remove from pan, and using a serrated knife, cut in to 1/2 inch slices.


Place slices back on the pan (turned on their side) and bake for another 6 minutes.  Flip slices over and bake for another 6 minutes.  Remove from pan and cool on a wire rack.

If you want to get fancy, melt 1 cup of chocolate chips and 1 Tbsp shortening in the microwave for 1 minute on High.  Stir until mixed and smooth.  Dip biscotti tips in the chocolate or drizzle over each.

Makes about 36 biscotti.

Hope you will give this recipe a try and let me know how you like them.  I always enjoy hearing your comments.  Until next time...


Saturday, February 22, 2014

NEW POST - "Caylee-ism #1

Saturdays are usually pretty hectic around our house.  Seems like I put things on hold, thinking that I'll have all day Saturday to get them finished, or started, or at least thought about.  But the one thing I look forward to is having lunch with my kids and their kids.  In case you don't know, I have the smartest, cutest, funniest grandkids in the world.  Having lunch with them is a crack-up because of the conversations that go on while we eat.  Miss Caylee and her twin sister, Kylie run on high octane 24-7.  To get them to sit still for 5 minutes is a miracle.  Their favorite place for lunch is anywhere that has chicken nuggets or tacos or french fries. Today we graced Taco Bell with our presence.  We love to go there.  The girls ate tacos, nachos, Doritos, and washed it all down with fruit freezes.  As soon as we got back home, Caylee wanted chocolate - her favorite food group.  She told Auntie Leslie that she wanted a chocolate heart (Valentine's leftovers).  Leslie said, "Isn't your tummy full?"  Now comes the Caylee punch line:  "My mouth still works."  We're still chuckling over that one.  Here are my darlings:

Wednesday, February 19, 2014

Painted Angel Ornament

Christmas in February!  Don't you love it?


I used to do a lot of tole and wood painting.  In fact, the walls in the spare bedroom/office/storage room are painted burgundy and have shelves filled with Santa Clauses I have painted, crafted and collected over the years. Yep, it's the Santa Claus room for sure.  I like to be in this room.  It's cozy and happy.

I have been missing the paint and brushes and the satisfaction of completing a project.   Then I discovered Megpie Designs on the internet.  She has a couple of very cute Christmas ornaments that I fell in love with. Here is my version of her wonderful Painted Baby Jesus Ornament.  Click here:  Megpie Designs  to view her complete tutorial.


Wooden Christmas Angel


The Finished Product

Here is the supply list:
2 1/2 " x 3/8"  egg cutout
3/4" round head plug
1" wood circle
1/4" eye screw
fine point permanent marker (Sharpie)
acrylic paints:
White
Flesh
Green
Red
Metallic Gold  (I used DecoArt Dazzling Metallics Glorious Gold)
Wood Sealer (I like spray sealer so I used Krylom UV-Resistant Clear Acrylic Coating)

Start with these wood shapes.  I could not find what I needed at my local craft store so I ordered these from craftparts.com.  Click here:  craftparts.com to go directly to their website.  I had the order in about a week. 


Paint the shapes accordingly.  I used both Americana and Ceramcoat paint, since that is what I had, but any brand of craft paint will work.  After the pieces dried, I smoothed the surface with a piece of brown paper grocery bag (if you can still find one) or even a paper towel, to remove the little "fuzzies" that appear when the grain is raised on the wood.


Next, drill a small hole in the top of each egg with an electric drill and a small drill bit.  Insert a small eye screw in the top.  *Make sure your hole is deep enough, almost the length of the screw or your egg will crack when you try to screw in the eye screw.  I learned this the hard way.


Here is a close-up of the faces.  I dipped the end of a brush in the black paint for the eyes.  After the black paint is dry, do the same with white or you can just leave black if you like that look better.  Blush the cheeks with some powdered blush and a Q-Tip.  I spray sealed the faces at this point because I didn't want the blush to rub off in the construction process.


When I painted the halos, I left a portion unpainted so the halos would adhere better to the egg body.  Sometimes glue will dissolve the paint.  This way I know I will have good adhesion.


Using a flat brush, shade the folds of the angel's robe.  Make a little puddle of gold paint on a piece of waxed paper. Wet your brush, dab off on a paper towel, then dip the tip of your brush in the gold paint.  Stroke the brush back and forth several times on the waxed paper to distribute the paint, then shade the folds.  Rinse your brush after each application then repeat the steps.  To shade the outside edges of the egg, I did one half at a time and reloaded the brush after each half.

I used a brass stencil and a piece of graphite paper to trace the holly.  You can free hand this easily, as well.  Paint the holly leaves with green paint.  When the green has dried, add the berries using the same method as you used for the eyes - dip dots.

Glue the head to the front of the egg with a good glue.  I used Beacon Adhesives Fabri-Tac glue.  Even though it is made to glue fabric pieces together, I have used it a lot to glue wood and it always makes a strong bond.  I got mine at Michael's Crafts & Floral.  Wait a few minutes for the head to set, then tie about a 7"- 8" length of ribbon through the eye screw for hanging.  Glue on the halo and you've got yourself a sweet little angle for the Christmas tree.


Have fun making some of these for your Christmas Tree or to give as gifts.  And thanks again to Megpie Design for her step by step instructions.  Check out her blog.  She had a lot of really cute stuff.

Please leave a comment. I enjoy hearing from you. 
Until next time...

Wednesday, February 12, 2014

New Post - Chicken Bliss

     I have two sisters-in-law, Jana and Rozanna.  We found out early on that we all loved to sew and quilt.  Jana was instrumental in declaring that we should establish a "Sisters Week" once a year where we could get together and just let loose...no meal fixing, husband tending, house cleaning or early wake-upping.  I grew up in Utah but now live in California, so I used the "homesick" excuse.  Our Sisters Week get-togethers were either in North Ogden or Park City.  
     In June 2008 we decided to meet in Park City at Jana's. At that time, Jana was a few months shy of being a 5 year breast cancer survivor.  We celebrated by going on a quilt hop and visiting every quilt shop within a 50 mile radius.  Good times. 
     Fast forward to early 2009.  The cancer was back with a vengeance but Jana insisted that we continue the Sisters Days tradition. She usually picked out our project and would mail a pattern with instructions to gather supplies and come prepared.  This year in the mail we got the "Chicken Quilt".  I remember thinking that this was going to be interesting.  I have to mention here that Jana's taste differed immensely from we other two.  She was not a girly girl and hated the color pink.  She liked bright and funky (hence the chickens). I like traditional and Rozanna not only likes, but loves gray and black.  Still trying to convince her that a pop of red never hurts.
     In July we met at Rozanna's in North Ogden.  Jana's sons drove her from Park City because she couldn't make the drive herself.  She was fighting a hard fight but she was slowly loosing.  Now the concern was whether to push on with our project or take it easy. Jana would have none of that.  We set up the sewing machines and got to work.  We laughed and cried and when Jana got tired she went to bed.  This was probably the most emotional, sweet, fun time we ever had together.  
     We named our quilts "Chicken Bliss".  The 3 chickens represent the three of us, dancing and twirling and having a good time...for the last time.  
     
     Jana passed away November 21, 2009.  

     My quilt hangs near the door to my sewing room.  Every time I pass it I think of the good woman who brought us closer together and taught me about courage and faith in the face of unbeatable odds.  I love you, Jana, and this quilt is truly one of my favorites.


Wednesday, February 5, 2014

Oregon Morning Muffins

     My friend, Nancy, (Nancy of the Thrift Store adventures) lives in Montana.  Before she became "Montana Nancy" she was "California Nancy" and taught Home Ec at the same High School where I worked.  Nancy is an amazing cook and taught me how to make sushi and biscotti among other taste bud delites.  I've continued in the biscotti making (almost every week) but my sushi skills are another story.  Best to leave the sushi making to the pros.
     Nancy is also a published cookbook author and today I would like to share her recipe for Oregon Morning Muffins.  Don't ask me where the name came from.  Maybe an Oregon pioneer woman who lived on a mountain woke up one morning and decided to make some muffins.  All I know is that these muffins are amazing.  Here is the recipe:

2 cups flour                                                                           1/2 cup chopped nuts
1 1/4 cup sugar                                                                     1/2 cup shredded coconut
2 tsp. baking soda                                                                 1/2 cup carrots, grated (1 large carrot)
2 tsp. ground cinnamon                                                          3 eggs
1/2 tsp. salt                                                                            1 cup vegetable oil*
2 cups grated apples (about 2 apples)                                     2 tsp. vanilla
1/2 cup raisins, dried blueberries or Craisins

* You can substitute 3/4 cup of either plain or vanilla Greek Yogurt for the oil.

In a large bowl, mix together flour, sugar, making soda, cinnamon and salt.


Stir in apples, berries, nuts, coconut and carrots.  Mix well.


Beat eggs with oil (or Greek yogurt) and vanilla; stir into flour mixture just until combined.  Spoon batter (I like to use and ice cream scoop.  Much easier than a spoon.) into greased muffin tins or use cupcake liners, filling 3/4 full.  Bake at 350 degrees for 25 minutes or until springy to the touch.  Cool in tins on a cooling rack for 5 minutes.  Remove from tins and serve warm.


I hope you will try these delicious muffins.  Betcha can't eat just one.

Until next time...

Wednesday, January 29, 2014

Quiet Books

Quiet Books 101

Every Sunday our 3 grandkids and their mom share a bench with us at church.  Six bodies gets kind of crowded.  Caleb is pretty good about entertaining himself...the twincesses are another story.  They are 3. They don't sit still for longer than 5 seconds and get tired of the same things to keep them occupied every week.  They think Grandma rocks (mainly for killing spiders, but that is another story), so I decided to make them a quiet book  in hopes of being able to hear at least some of what the speakers have to say.  Piece of cake for a veteran seamstress such as myself, right?  Little did I know what I was in for.  

I looked at a lot of posts on Pinterest and picked out a few ideas that looked the easiest to start with.  I was a newby to Quietbooking after all.  Most of the instructions said that using pellon for the pages was better than felt because it kept its shape better.  Pellon is was.  I got myself to Joann's Fabrics and bought 5 yds. of pellon.  I figured that would make more than enough pages.  I cut the pages twice the length of a regular page so that I could fold them in half, which would save on the cutting and stitching. 

Here is where I confess that I made a big mistake.  I my haste, I ended up buying fusible pellon instead of the regular kind.  I didn't realize this fact until I started sewing on the pieces that needed to be more stable. After ironing on the felt pieces that didn't need to be sewed, my pages stuck together and I couldn't sew anything to the back side of the page. I finally worked out how to get all the pieces sewn down and glued on, but take my advice... read the label on the bolt of whatever you buy at the fabric store.  If I try this again, and it''s a big "IF", I might use all that fusible pellon I have left to fuse 2 pieces of felt or cotton fabric together for pages.  Wish I had thought of that sooner.

Anyway - 
Here are a few of the pages I made.  I think I will test drive these Sunday at church.  Who knows, maybe I'll be able to hear some of what is said from the pulpit.


If you click on the Pinterest link at the top of my home page and go to my Quiet Book Pinterest Board, you'll be able to see some very creative ideas, some of which I used for my pages. Most follow the same basic construction method and there are several ideas for quiet book covers as well.  

Thanks for stopping by.  Until next time...